
3D Printing · Prototyping · Decision Guide
FDM vs Resin 3D PrintingChoosing the right technology for your prototype
FDM and resin 3D printing produce parts that look similar but are built on completely different physics — and picking the wrong one will cost you time, money, and a reprint. Here is the practical framework for making the right call first time.
Before comparing outputs, it is worth understanding what each machine is physically doing — because the process explains almost everything about the trade-offs downstream.
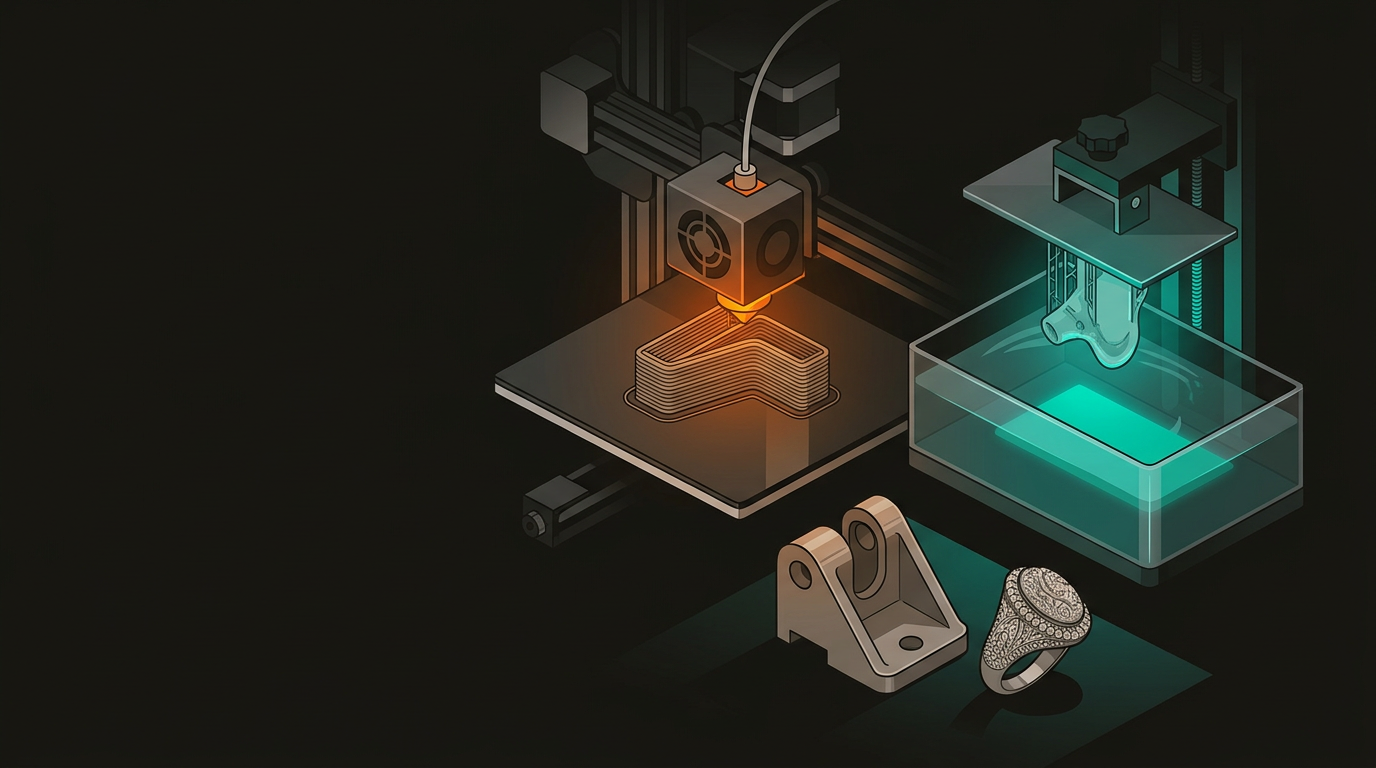
Melts a thermoplastic filament and deposits it layer by layer onto a build plate. Think of it as a very precise, computer-controlled hot glue gun. Common materials include PLA, PETG, ABS, ASA, and TPU — each suited to different applications.
Uses a UV light source (laser or LCD) to cure liquid photopolymer resin one layer at a time. Instead of building upward with melted plastic, the part is pulled out of a vat of liquid as each layer solidifies beneath it.
Two fundamentally different processes. Two fundamentally different results. Knowing which one suits your job is the whole decision.
If you need fine detail, resin wins — and it is not a close contest. FDM parts are built with visible layer lines. At the standard 0.2mm layer height, those lines are obvious to the eye and to the touch. Dialling back to 0.1mm or 0.05mm reduces this, but print time blows out fast and lines remain visible under close inspection.
Resin printers typically run 0.025–0.05mm layer heights as standard. The curing process produces a much smoother transition between layers — text, threads, small interlocking features, and organic curves all come out crisp and clean.
When this matters
- Jewellery masters and casting patterns
- Miniatures and figurines
- Dental or medical models
- Consumer product prototypes where aesthetics are being evaluated
- Any part under 100mm where fine detail is critical
When it doesn’t
- Structural brackets that live inside a machine and never see daylight
- Large enclosures being sanded or painted anyway
- Functional clips and snap-fits where a bit of surface texture actually helps
Standard photopolymer resins are brittle. They look beautiful on a desk; drop them and they crack. They’re also sensitive to UV exposure over time, making outdoor or long-term applications tricky without specialist materials. FDM thermoplastics offer a proper range of real-world mechanical properties — choosing the right filament is most of the job.
Anything that needs to be dropped, flexed, torqued, left in the sun, or exposed to chemicals — FDM with the right material will almost always outperform standard resin.
This is where assumptions tend to fall apart. Neither process is universally cheaper or faster — it depends entirely on part size, geometry, and how many iterations you are running.
FDM is usually cheaper for
- Large parts — build volumes are typically much bigger
- Simple geometry without heavy support structures
- Functional prototypes where surface finish isn’t the point
- Multiple iterations without blowing the budget
Resin costs more because
- Material is pricier than filament per volume
- Post-processing needs IPA wash, UV curing station, and time
- Failed prints waste expensive liquid resin
- Smaller build volumes often mean splitting and bonding large parts
Speed is more nuanced than most people expect. A small, detailed resin print can be faster than an equivalent FDM part — the entire layer cures at once rather than being traced line by line. But a large FDM part on a big-format printer can run overnight in a way resin simply cannot match at scale.
Theory is useful. Real jobs are better. Here are three project types that illustrate how the decision plays out in practice — all typical of what arrives at a New Zealand print service.
Electronics enclosure — IoT startup
A small NZ tech company needed a prototype housing for a sensor device: PCB fit, snap-fit tabs, and presentation-ready for investor demos. Result: FDM in PETG. Functional tabs, accurate dimensions, light sand and spray paint for the demo. Resin would have looked better straight off the printer — but those snap-fits would have been fragile.
Jewellery casting master — Auckland designer
A jewellery designer needed a ring master for silver casting. Every surface curve and engraved detail counted. Result: resin, printed at 0.025mm layer height in castable resin — burned out cleanly in the investment casting process. FDM was not in the conversation for this one.
Automotive bracket — Kiwi fabrication workshop
A workshop needed a mounting bracket to hold a controller unit in an engine bay — heat, vibration, occasional moisture. Result: FDM in ASA. UV and heat stable, strong enough for the mechanical load, and cheap enough to print three iterations to dial in the fit before committing.
Not sure where your project sits? Work through this before speaking to a print service — it saves time on both sides.
Choose Resin if…
- Fine surface detail or smooth aesthetics are required
- The part is small (typically under 150mm in any dimension)
- It’s a display model, casting master, or dental/medical use
- Layer lines are a dealbreaker and post-processing time is not
Choose FDM if…
- Real mechanical strength or flexibility is needed
- The part is large, or cost per unit is a real consideration
- Material properties matter — heat, UV, or chemical resistance
- You’re iterating quickly and will sand or paint the result anyway
- Volume production is on the horizon
Consider a hybrid approach when you need a fine-detail outer shell with a structural internal component — hybrid assemblies are more common than people realise, and a good print service can advise on bonding methods and tolerances.
Prototyping in New Zealand? Plastixel — GeoSaffer’s dedicated 3D printing brand — runs both FDM and resin setups and can advise on the right process, material, and cost before you commit to a print run. We’d rather spend five minutes steering you toward the right technology upfront than reprint a job that was never suited to it.
Get a free quote at GeoSaffer.com →