Electronics Repair Workshop Setting up your repair bench and the tools that actually matter
The difference between productive repair work and an evening of mounting irritation usually comes down to your bench and your tools. Whether you’re a hobbyist getting serious, a technician carving out a dedicated workspace, or a small business owner tired of sending simple faults to third parties — here’s a practical starting point written with NZ workshops in mind.
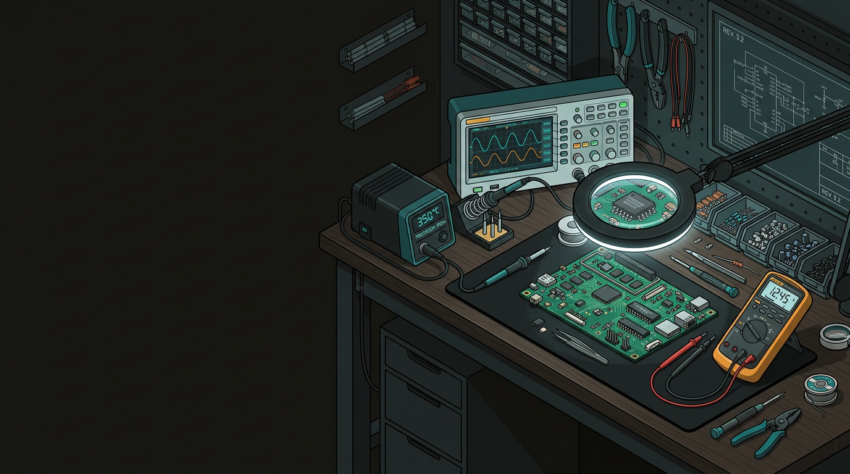
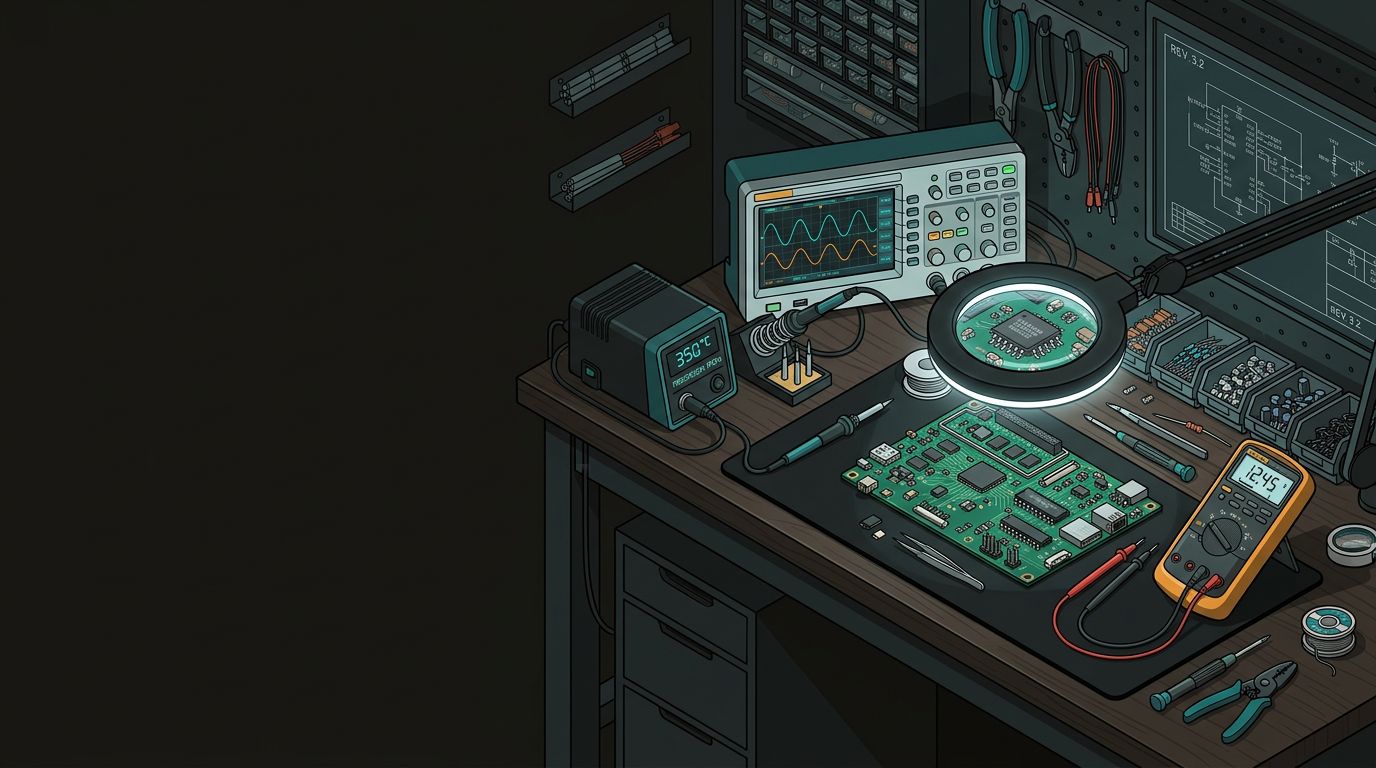
Before you buy a single tool, think about your bench. A poor workspace will slow you down and introduce safety risks that no amount of expensive equipment will compensate for.
Minimum 1.5 m wide × 600 mm deep. Solid, non-conductive work surface. ESD-safe rubber matting is not optional for modern electronics work.
LED ring light or articulated arm lamp with built-in magnifier. Daylight-balanced 5000–6500K so you can accurately read component markings and catch burnt traces.
Flux fumes are genuinely harmful with repeated exposure. A fume extractor positioned to draw away from your face — a proper filtered unit, not a repurposed desk fan.
Organisation sounds obvious until you’ve lost a 0.5 mm screw at 10 pm mid-repair. Labelled component drawers, magnetic parts trays, and a dedicated “in progress” zone separate from your clean bench area are small things that quietly save your sanity.
Good diagnostics separate competent repair from guesswork. You don’t need to spend thousands, but skimping on key instruments tends to cost more in wasted time than whatever you saved upfront.
Running out of basics mid-repair is avoidable. Keep your bench stocked with these — all available from NZ electronics and chemical suppliers.
Soldering Supplies
- 60/40 or 63/37 tin-lead solder, 0.6–0.8 mm diameter
- No-clean rosin flux in pen or syringe
- Desoldering braid/wick and a quality pump
- Tip tinner and cleaning brass wool
Cleaning & Protection
- IPA 99% for flux residue and PCB cleaning
- Kapton tape for selective rework masking
- Conformal coating for boards returning to harsh environments
- Anti-static bags for component storage
The most common mistake beginners make is jumping straight into repairs before they actually understand the fault. A structured approach takes discipline but saves time and prevents compounding the original problem.
Before powering anything up, inspect the board visually under good lighting and magnification. Swollen capacitors, burnt components, cracked traces, corrosion — these tell you where to look next.
When first powering a suspect board, use your bench PSU with current limiting set conservatively. A short trips the current limit rather than popping another component.
A 5V rail sitting at 3.2V makes everything downstream suspect. Work back from the symptom toward the cause rather than chasing components at random.
In-circuit measurements save unnecessary component removal. Learn to interpret readings with parallel paths in mind — it changes what the numbers mean.
Phone photos before disassembly, measurements noted, connector pinouts sketched. You’ll be glad you did when it’s midnight and you’re trying to remember where that ribbon cable went.
A few things worth flagging specifically for the NZ context.
Mains Voltage Work
- Regulated under the NZ Electricity Act
- Mains-connected wiring must be done by a registered electrician
- Low-voltage side of a PSU is generally fine
- Mains input side is not your territory unless qualified
ESD and Battery Safety
- Wrist strap + bench mat + proper grounding — use every time
- $20 investment prevents invisible damage that shows up later
- Handle swollen lithium cells carefully with ventilation
- Dispose via Battery World or council collection points
PCB-level faults in complex multi-layer boards, BGA component replacement, and anything requiring reflow ovens are areas where the equipment investment rarely makes sense for occasional use. GeoSaffer’s team in Auckland works on electronics repair at the PCB level — diagnostic-first, which matters when you’re dealing with faults that don’t have obvious causes. No sales pitch, just straight conversation from people who find this work genuinely interesting.
Talk to the GeoSaffer repair team →