

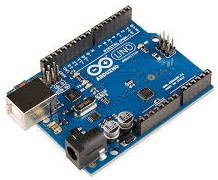
Build a Bluetooth Thermometerwith Arduino and the HC-05 Module
A handful of components, a few jumper wires, and an Arduino sketch of under 25 lines — that is all it takes to stream live temperature data to your Android phone over Bluetooth.
This build uses off-the-shelf components available from most electronics suppliers. The total cost is typically under $15 NZD if you source the modules from AliExpress or a local maker shop.

The circuit forms a four-stage pipeline from sensor to screen. Each stage handles a single responsibility, which keeps the sketch simple and the data path easy to debug.
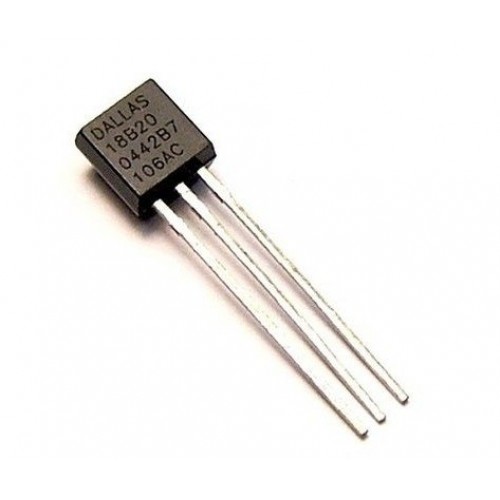
Reads ambient temperature using the OneWire protocol — a single-wire serial bus where data and power share the same line.
Requests a reading from the sensor library, receives the raw Celsius value, and formats it as a decimal string terminated with \r\n.
Acts as a transparent UART-to-Bluetooth bridge. Whatever the Arduino writes to Serial appears wirelessly on the paired Android device.
Receives the string over Bluetooth SPP, strips the \r\n terminator, parses the decimal, and displays the live temperature reading.
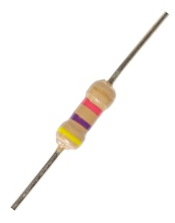
The 4.7 kΩ pullup resistor on the DS18B20 data line is not optional. The OneWire bus uses an open-drain configuration — devices can pull the line low but cannot drive it high. The pullup resistor provides the resting HIGH state that the protocol depends on to distinguish bits. Without it, readings return as −127 °C (a sentinel error value from the library) or simply fail.
9600 baud is used because it is the HC-05’s default data-mode baud rate and matches the serial monitor’s default. It is more than adequate for a one-number-per-second data stream — a single temperature reading such as “23.62\r\n” is under 10 bytes, which takes less than 1 ms to transmit at 9600 baud.
Make these six connections on a breadboard before uploading any code. Power down the Arduino before making or changing wiring — the HC-05 is a 3.3 V device and an accidental 5 V short to its RX pin can destroy it.
-
1
DS18B20 VCC → Arduino 5V. The sensor accepts 3.0 V–5.5 V; using 5 V from the Arduino is the simplest option and matches the pullup resistor’s reference voltage.
-
2
DS18B20 GND → Arduino GND. Connect all grounds together on the same breadboard rail.
-
3
DS18B20 DATA → Arduino Pin 2, with 4.7 kΩ pullup to 5V. Run a 4.7 kΩ resistor between the data line and the 5 V rail. The sketch defines
ONE_WIRE_BUS 2— change both if you use a different pin. -
4
HC-05 VCC → Arduino 5V. The HC-05 module has an onboard 3.3 V regulator, so feeding it 5 V from the Arduino is correct and expected.
-
5
HC-05 GND → Arduino GND. Same ground rail as everything else.
-
6
HC-05 TXD → Arduino Pin 0 (RX) direct. HC-05 RXD → Arduino Pin 1 (TX) via voltage divider. The HC-05 TXD outputs 3.3 V logic, which the Arduino Uno reads reliably without modification. However, the HC-05 RXD pin is only rated to 3.3 V — connect a 1 kΩ resistor from Arduino Pin 1 to HC-05 RXD, then a 2 kΩ resistor from that junction to GND. This divides the 5 V signal to ≈ 3.33 V, safely within the HC-05’s input range.

Reference wiring diagram — DS18B20 data on pin 2 with 4.7 kΩ pullup to 5 V, HC-05 TXD → Arduino pin 0 (RX), HC-05 RXD ← Arduino pin 1 (TX) via 1 kΩ / 2 kΩ voltage divider.
Library installation: before uploading, open Arduino IDE → Tools → Manage Libraries, then search for and install both OneWire (by Paul Stoffregen) and DallasTemperature (by Miles Burton). The DallasTemperature library depends on OneWire, so both must be present for the sketch to compile.
The sketch is deliberately minimal — 25 lines of logic that do exactly one thing: read a temperature and send it over Serial once per second.
// Include the libraries
#include <OneWire.h>
#include <DallasTemperature.h>

// Data wire goes to pin 2 on the Arduino
#define ONE_WIRE_BUS 2

// Setup a oneWire instance
OneWire oneWire(ONE_WIRE_BUS);

// Pass our oneWire reference to Dallas Temperature.
DallasTemperature sensors(&oneWire);

void setup(void)
{
 // start serial port at 9600 baud
 Serial.begin(9600);
 Serial.println("Temperature Demo started");
 // Start up the sensor library
 sensors.begin();
}

void loop(void)
{
  // request temperature reading
 sensors.requestTemperatures();
 // print the first sensor value
 Serial.print(sensors.getTempCByIndex(0));
 // send termination string the app expects
 Serial.println("\r\n");
 // wait 1 second
 delay(1000);
}
setup() runs once on power-on: it opens the serial port at 9600 baud, prints a startup message (visible in the serial monitor to confirm the board is alive), and calls sensors.begin() to initialise the OneWire bus and enumerate any connected DS18B20 sensors. loop() runs continuously: requestTemperatures() sends a conversion command down the OneWire bus — the DS18B20 takes up to 750 ms to convert at 12-bit resolution, which is why the delay(1000) at the end gives it plenty of time. getTempCByIndex(0) fetches the result from the first sensor on the bus and returns it as a float in degrees Celsius. Serial.print() sends that number as a human-readable decimal string, followed by Serial.println("\r\n") which appends both a carriage return and a newline — the companion Android app uses this double terminator to know where one reading ends and the next begins.
Test over USB first — confirm the sketch is working before involving Bluetooth. Once you see readings in the serial monitor, the wireless step is straightforward.
-
1
Upload the sketch and open the serial monitor. In Arduino IDE press Ctrl+Shift+M (or Tools → Serial Monitor). Set the baud rate dropdown to 9600. You should see “Temperature Demo started” followed by a new temperature reading every second — e.g.
23.62. If you see-127.00, check the 4.7 kΩ pullup resistor and DS18B20 wiring. -
2
Connect the HC-05 and power cycle the Arduino. Close the serial monitor first — the HC-05 shares Arduino’s hardware serial (pins 0 and 1), so you cannot have the monitor open while the module is connected. After power-on, the HC-05 LED will blink rapidly (~5 times per second), indicating it is advertising and waiting to be paired.
-
3
Pair the HC-05 with your Android phone. Go to Settings → Bluetooth → scan for new devices. Select HC-05 from the list. When prompted for a PIN, enter 1234 (the factory default). The HC-05 LED will change to a slow double-blink once paired.
-
4
Download the Bluetooth Thermometer app. Search Google Play for “Bluetooth Thermometer” by MyPhoenix, or use the direct link: play.google.com/store/apps/details?id=za.co.myphoenix.bt_temp. The app is free and requires no sign-in.
-
5
Connect and read the temperature. Open the app, tap the Bluetooth icon, and select HC-05 from your list of paired devices. Within 2 seconds the live temperature reading should appear on screen. The app displays the current value and maintains a 30-point rolling history graph — no extra hardware or configuration required.
Once your thermometer is transmitting data, pair it with the companion Android app to get a live graphical display and 30-point history graph — no extra hardware required.
Get the Bluetooth Thermometer App →